Getting Started With Building Your Store
How to Start Using Storewid
I would to take this opportunity to welcome you to the Storewid ecosystem. As you know Storewid helps entrepreneurs and small businesses easily create, manage and grow their online stores with ease.Our focus is and will always be to help you achieve your business goals while providing you with all the necessary tools.
Today ill be going over how one can get started with Storewid ill go over a step by step scenario from the registration screen to the first steps you need to take to get up and running

.png)
Storewid is not complicated to get started and also to use. However, I will be your guide today and provide you steps that you need to get up and running.
STEP 1
Click on the signup or register button, This will take you to the screen below
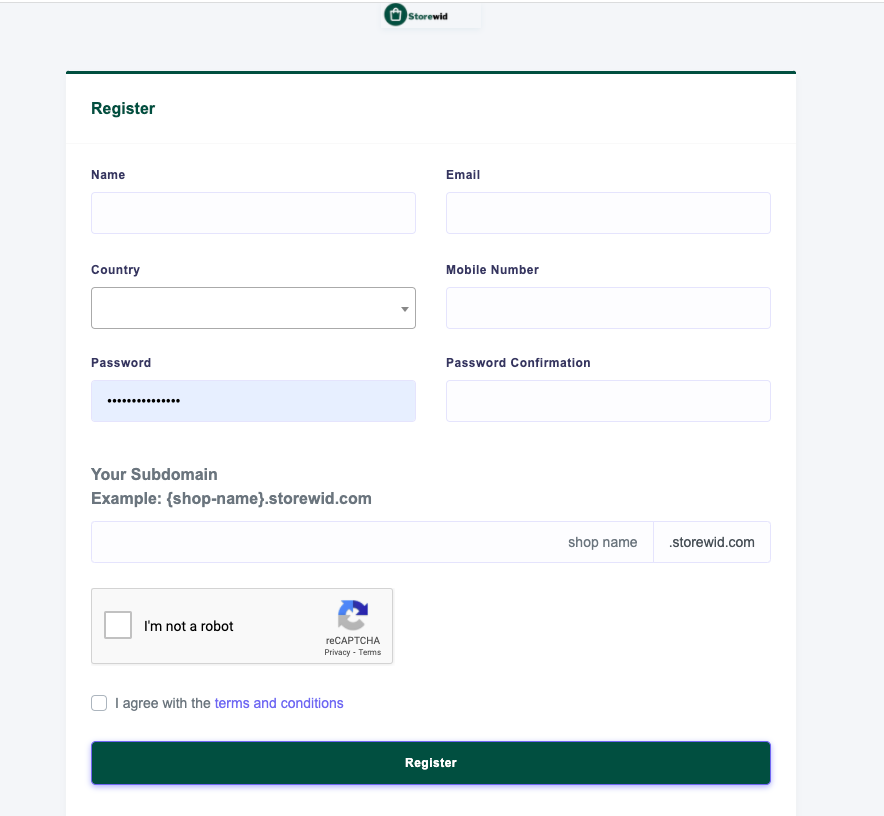 All you need to do is to fill the necessary fields as indicated, on the part where it's written shop name enter the name that you want to appear as a subdomain and later as a domain. So let's say my business name is ebidhaa enterprise I will enter ebidhaa as a shop name.
By doing so my shop will be available on ebidhaa.storewid.com just after registration and I can later buy a domain name so that my shop can be accessed on ebidhaa.com.
After filling in all details needed remember to agree to the terms and conditions then click on the register button, You will then be redirected to your store login panel.
For the sake of clarity and easy understanding, I will be using a demo store (demo.storewid.com)
STEP 2: LOGIN TO YOUR STORE
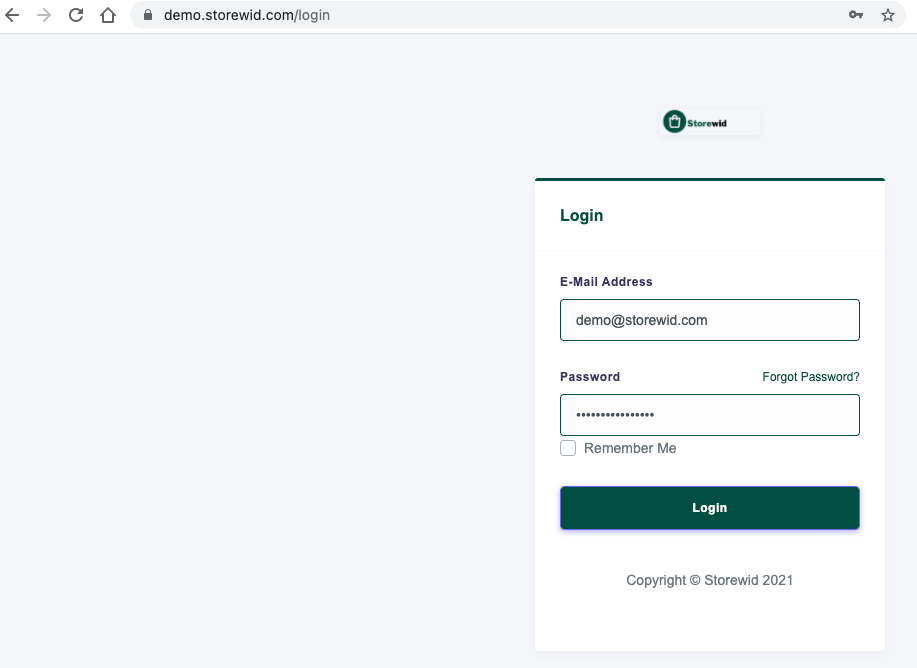
On this step, all you need to do is to Login to your store with your email address and password used. Once you have logged in successfully you will see your account as on the screen below.
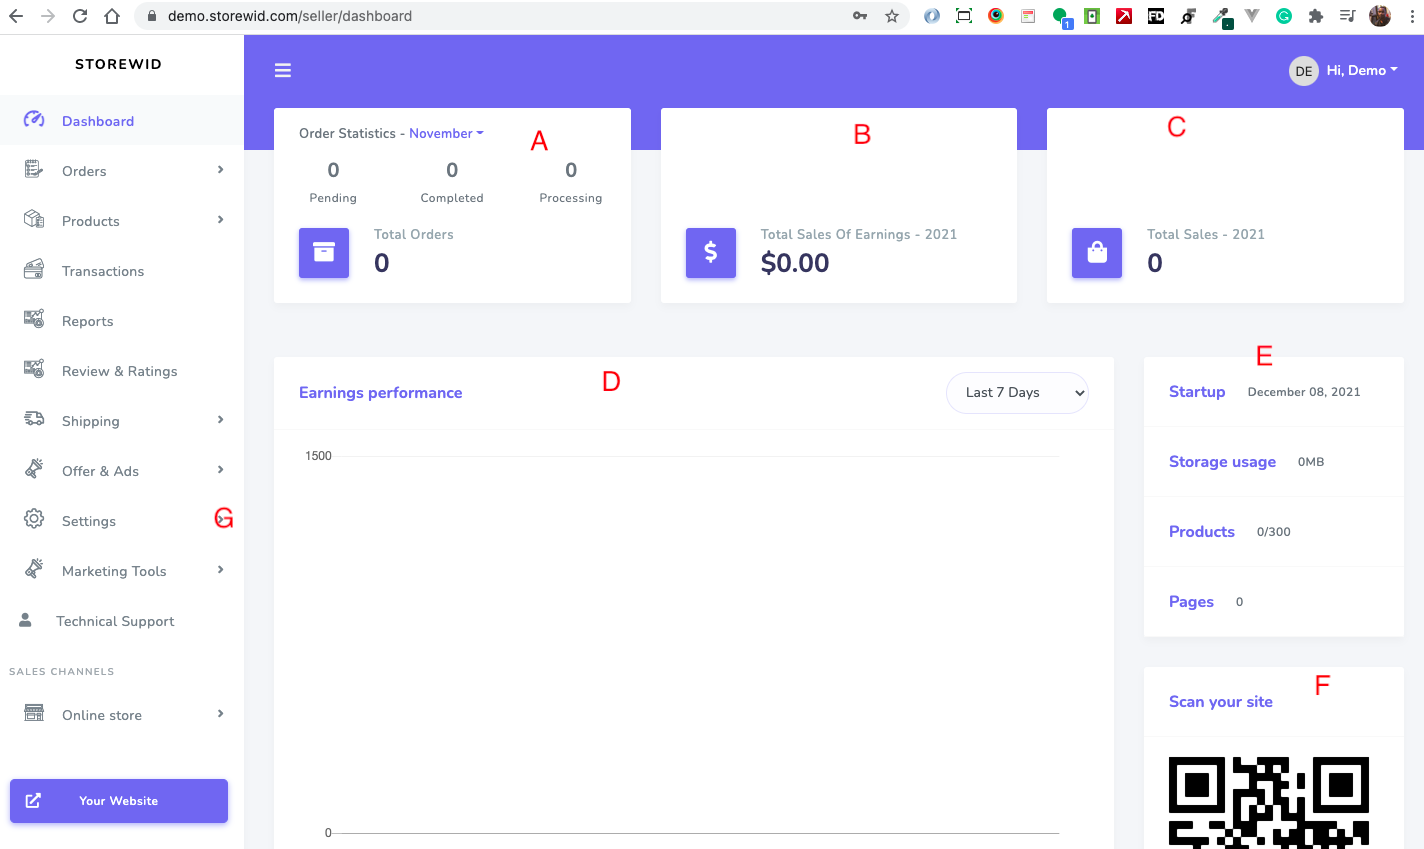 I am briefly going to go over the items labeled by alphabet letters on the image above.
A: Shows you a summary of your orders in terms of months thus [ Pending, Completed, Processing ], also the total number of orders available.
B: This shows the total earnings for the current year, please note that the $ can change to your currency.
C: Shows total sales in terms of numbers.
D: Gives you a summary in terms of a graph of earnings performance.
E: Shows your current plan and when you need to renew it.
F: Shows your shop's QR code you can easily download it and share it with your client's friends etc.
G: Is your website shop settings and will be the focus of our guide.
STEP 3 LET'S CUSTOMIZE OUR WEB STORE
On the left side on the settings menu chosen Shop settings see the image below
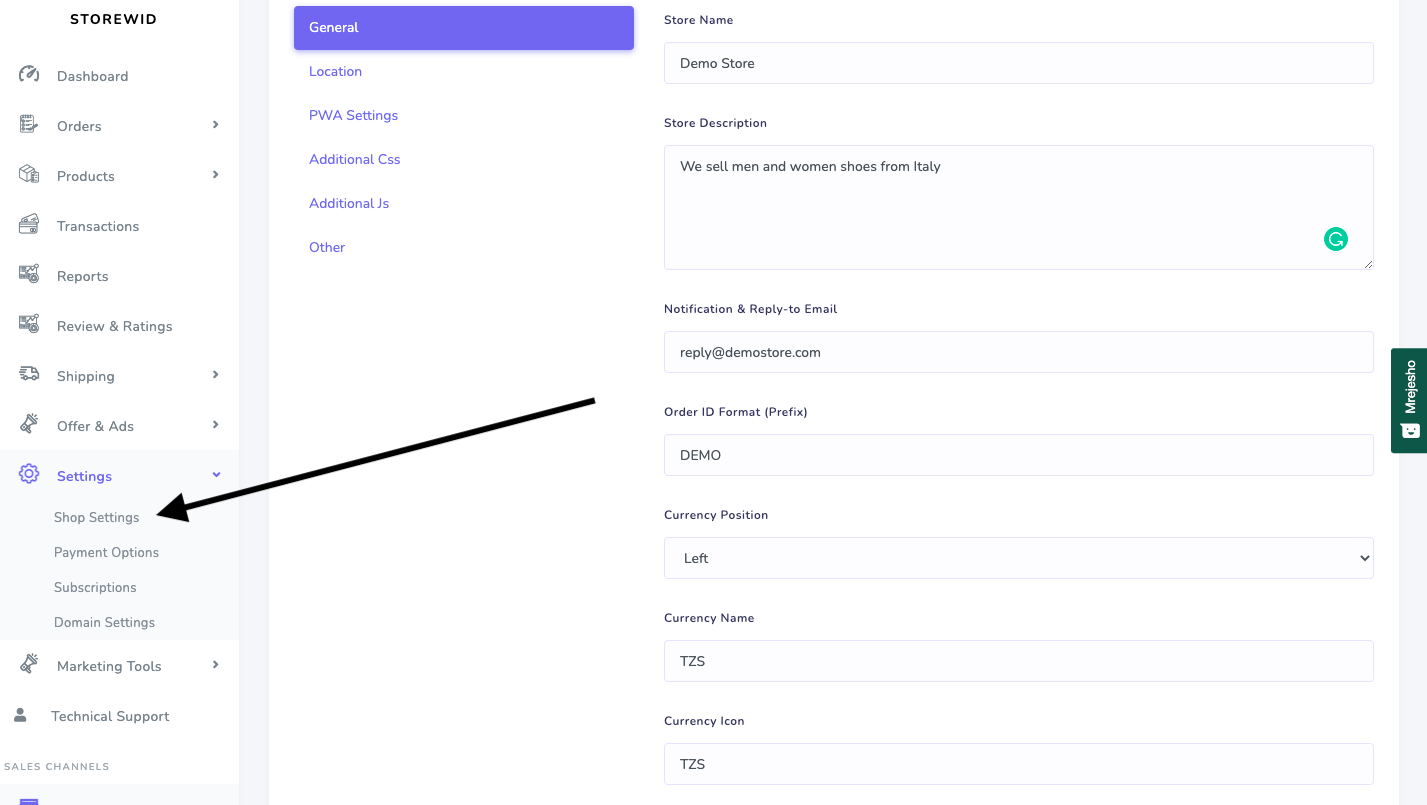 This will open a settings window where you can begin to customize your store.
Store Name
Here you need to enter the name of your store this will appear on your web storefront, In my case, I went with Demo Store you can go with any name try the name of your business.
Store Description
This item requires you to describe your business what it does etc so that your customers can easily view and understand.
Notification and Reply Email Address
This is the address where your customers will see and receive email notifications from you.
Order ID Format
This is the format prefix name of how your order identification number will be you can start with the first three letters of your store name.
Currency Options
On currency options, you can fill any currency that you want to appear on your products.
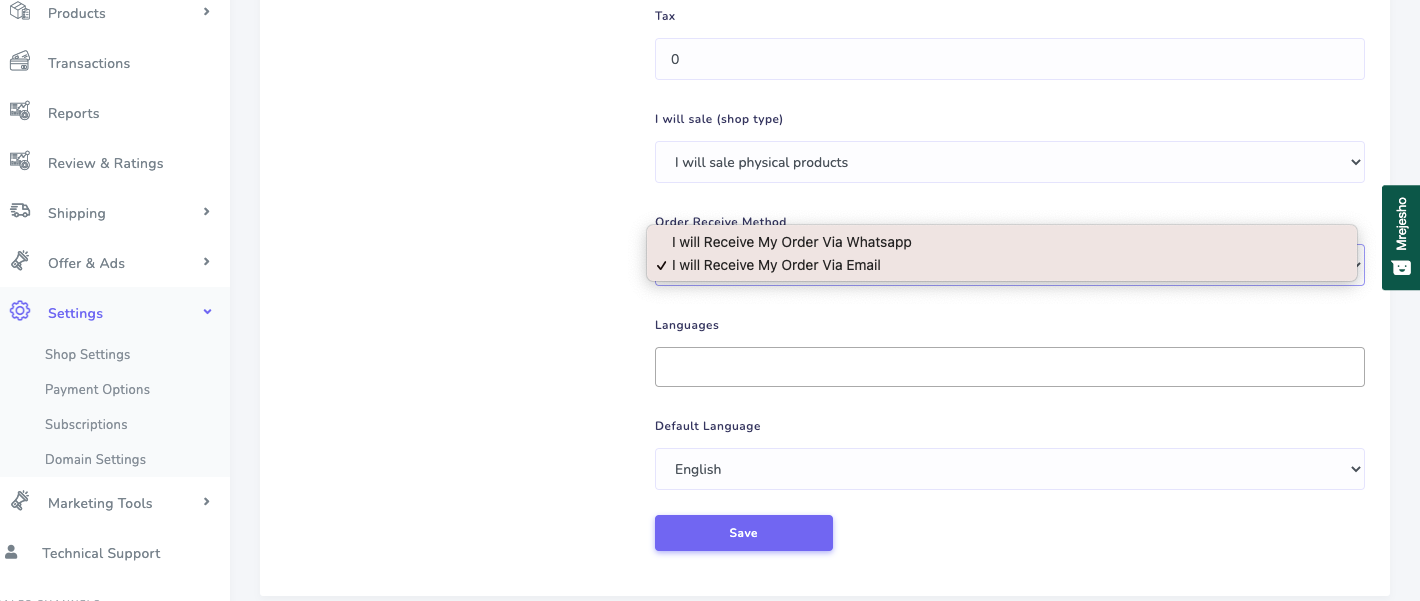 Tax
Tax
Depending on the nature of your business and where you are you may wish to add tax.
On Languages
We currently support English alone we will be adding more languages but if you need to change your store's language this is where you will do it.
STEP 4 Quick Pick Of Our Web Store
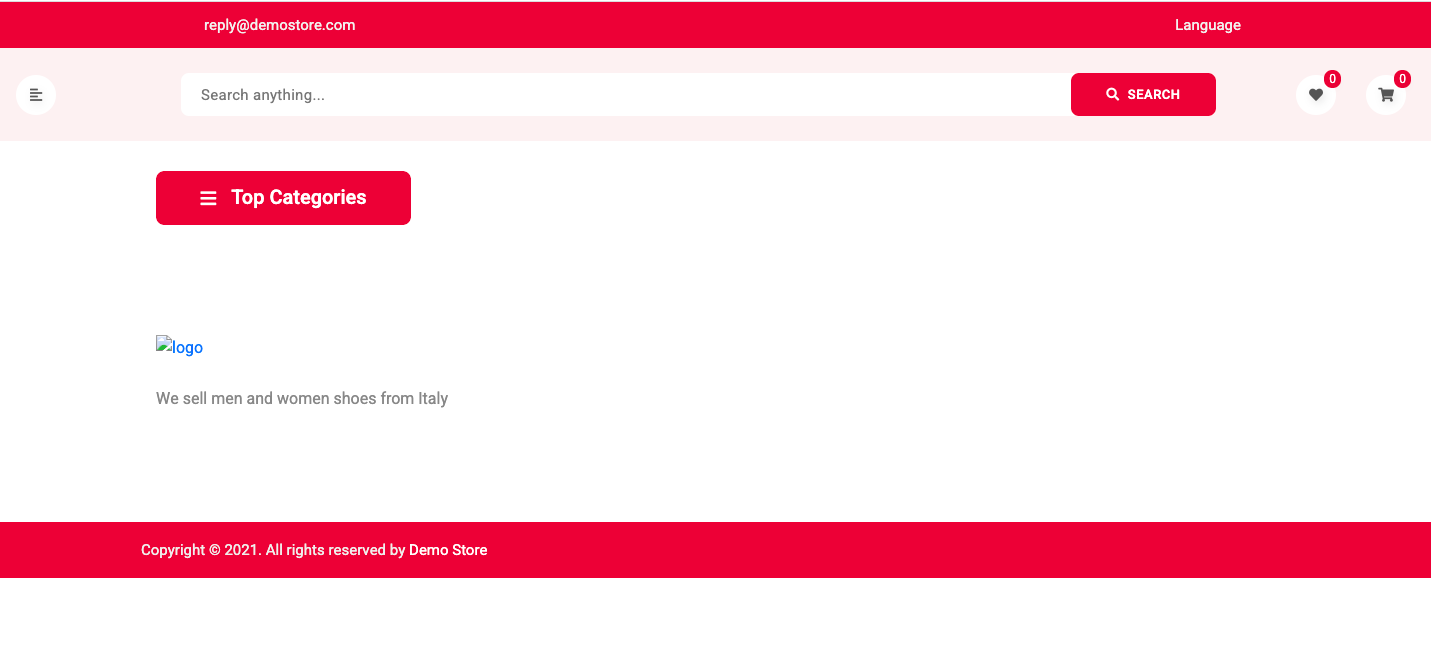 A quick look at our web store we can see areas that have begun to change specifically the name of store description etc.
In the next articles we will look into how to do the following
Change Colour and Brand
Logo
Adding Products
Sliders
Changing theme ( thus selecting another design).
Are you having issues or do you need more instructions? reach us on info@storewid.com or chat with us here chat